
Vetric Data Collection Jobs
This documentation covers best practices and how to setup and use Vetric sources using the Pipeline UI.
1. Register your Vetric API Key
To get started with Vetric, you must first have an API Key from Vetric (please contact us if you don’t already have one). You can do this by going to the "Keys & Secrets" page within Portal. Keys & Secrets.
2. Navigating to your Pipeline
Within your Pipeline, select a new ingress, and choose a Vetric Ingress data source. Select "Configure".
3. Configuring Vetric Component
Below is an example screenshot of a Vetric Ingress component that has been configured. Optional fields do not need to be filled, but are great for adding additional clarity. There are three main sections:
- Node Properties: This is how the node will appear in the Pipeline viewer.
- Component Properties: This is where we will choose the authorization from step 1.
- New Job: The component will prompt for the creation of an initial job. You can specify your query, and add any additional steps. A label is also useful for adding metadata to separate the results coming from different jobs.
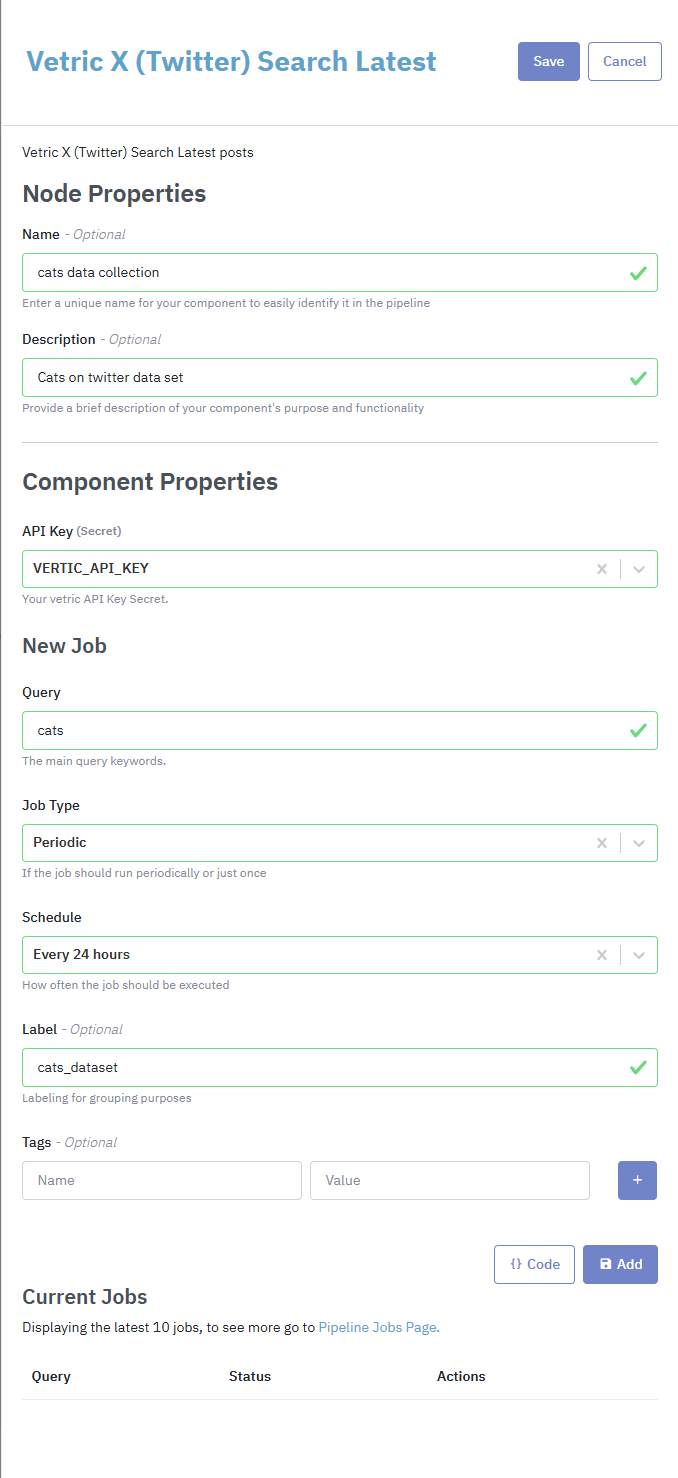
Configure Vetric Ingress component
Periodic Jobs
Periodic jobs running on a recurring basis that you can set. Timeframes are selectable from hourly to every 7 days. When a Job is saved, it will wait the defined timeframe before running and searching for data since last run. It will then continue to run on that periodic timeframe.
4. Saving
Pipeline Job is now ready to go! You can add additional jobs from this screen at any time. Once this Pipeline is deployed with these latest changes, your tasks will being processing automatically. You also can add new jobs at any time within needing to add additional pipelines.
You are all set!
If you want to explore with a sample source before diving into production usage, try out these sample sources: https://docs.datastreamer.io/docs/sample-sources.
Updated about 2 months ago